Part 3: Branding
In GeoApps, we have the possibilty to add branding to our app. Branding is custom app styling added via your GeoApps environment, without having to hardcode all of the colors, width and images into your app.
Adding LESS variables
Before we can add branding to our app, we need to add variables to our main.less. In this tutorial, we want to choose a background color for our header and give our app a logo.
in the main.less file, scroll to .top and remove the given rgb color for background-color. Replace it with @accentColor:
.top {
    width: 100vw;
    background-color: @accentColor;
    height: 100px;
    top: 0;
};
Expand manifest
In order to use branding, we need to expand our manifest.
Im the manifest, in the branding field we add another field called variables inside the themes field:
    branding:
      main: ./less/main.less
      themes:
        - themeId: <your theme id>
          title: Default
          default: true
          variables:
            - key: "@accentColor"
              title: Accent Color
              type: Color
              value: "#00b0ff"
Variables has 4 more fields:
- Key - Name of the variable. The key corresponds with the variable given in the main.less.
- Title - The title given to this branding variable.
- Type - The type of branding, here we say what type the branding is, in this case we want to add a background color via branding so the type is
Color. The table underneath tells what types are possible.
| Type | What | Where | Example |
|---|---|---|---|
| Color | Color (Hex) | To add color | Background-color: #237fa2 |
| File | Filepath | To add a file | Background-image: ./images/image.png |
| Text | String value; Number value | To add string or numerical values | Width: 200px Position: absolute |
|
- value - The default value.
We can now publish our branding. The way branding is going to work is we can change the value of of this variable in our environment.
Creating branding in manage
To use branding we need to create one first.
In your manage enviroment, navigate to Assets, Branding and click + Add. We now get the following screen:
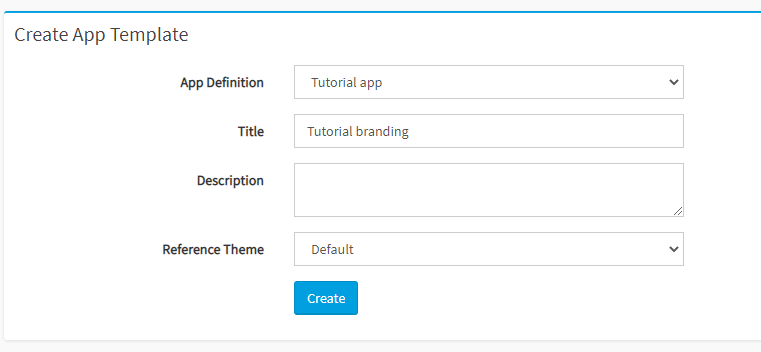
At App Definition we choose the name of the app we have created earlier. For Title we can give any name we want. In Reference Theme we chooce the default. The name Default comes from the title field in themes in our manifest.
Click Create.
Configure branding
Now that we have added a braning, we can now configure it.
After you have clicked on the Create-button, we get automatticaly navigated to the following page:
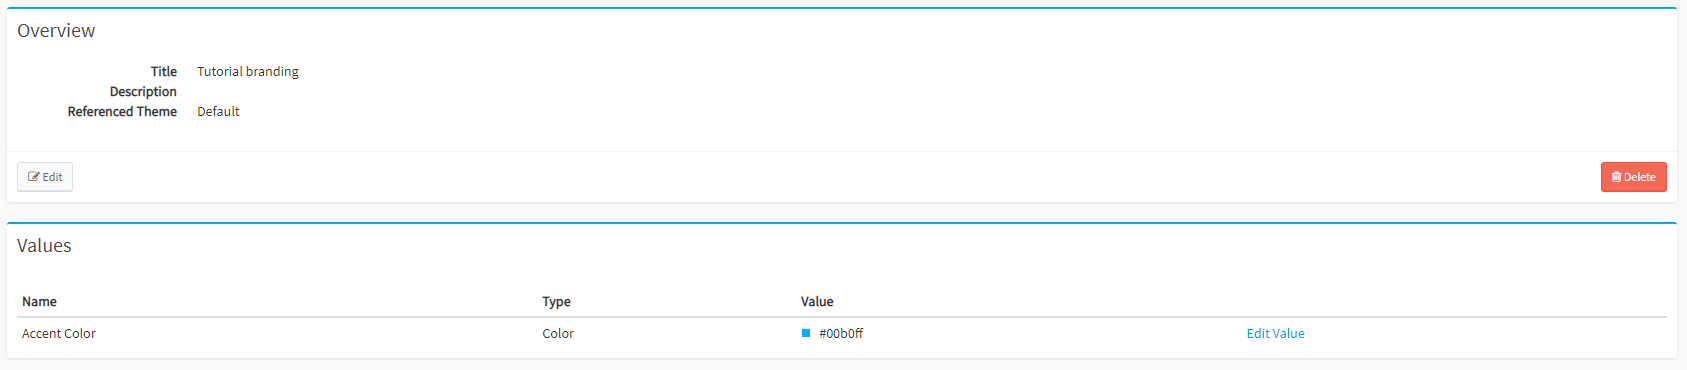
Here we can see our Accent color we have added to our manifest. In the far right, click Edit Value. Give Accent Color the following color: #3be483, or any other color you like, and click Save.
Adding branding to our app
To use the branding, we need apply the branding to our app.
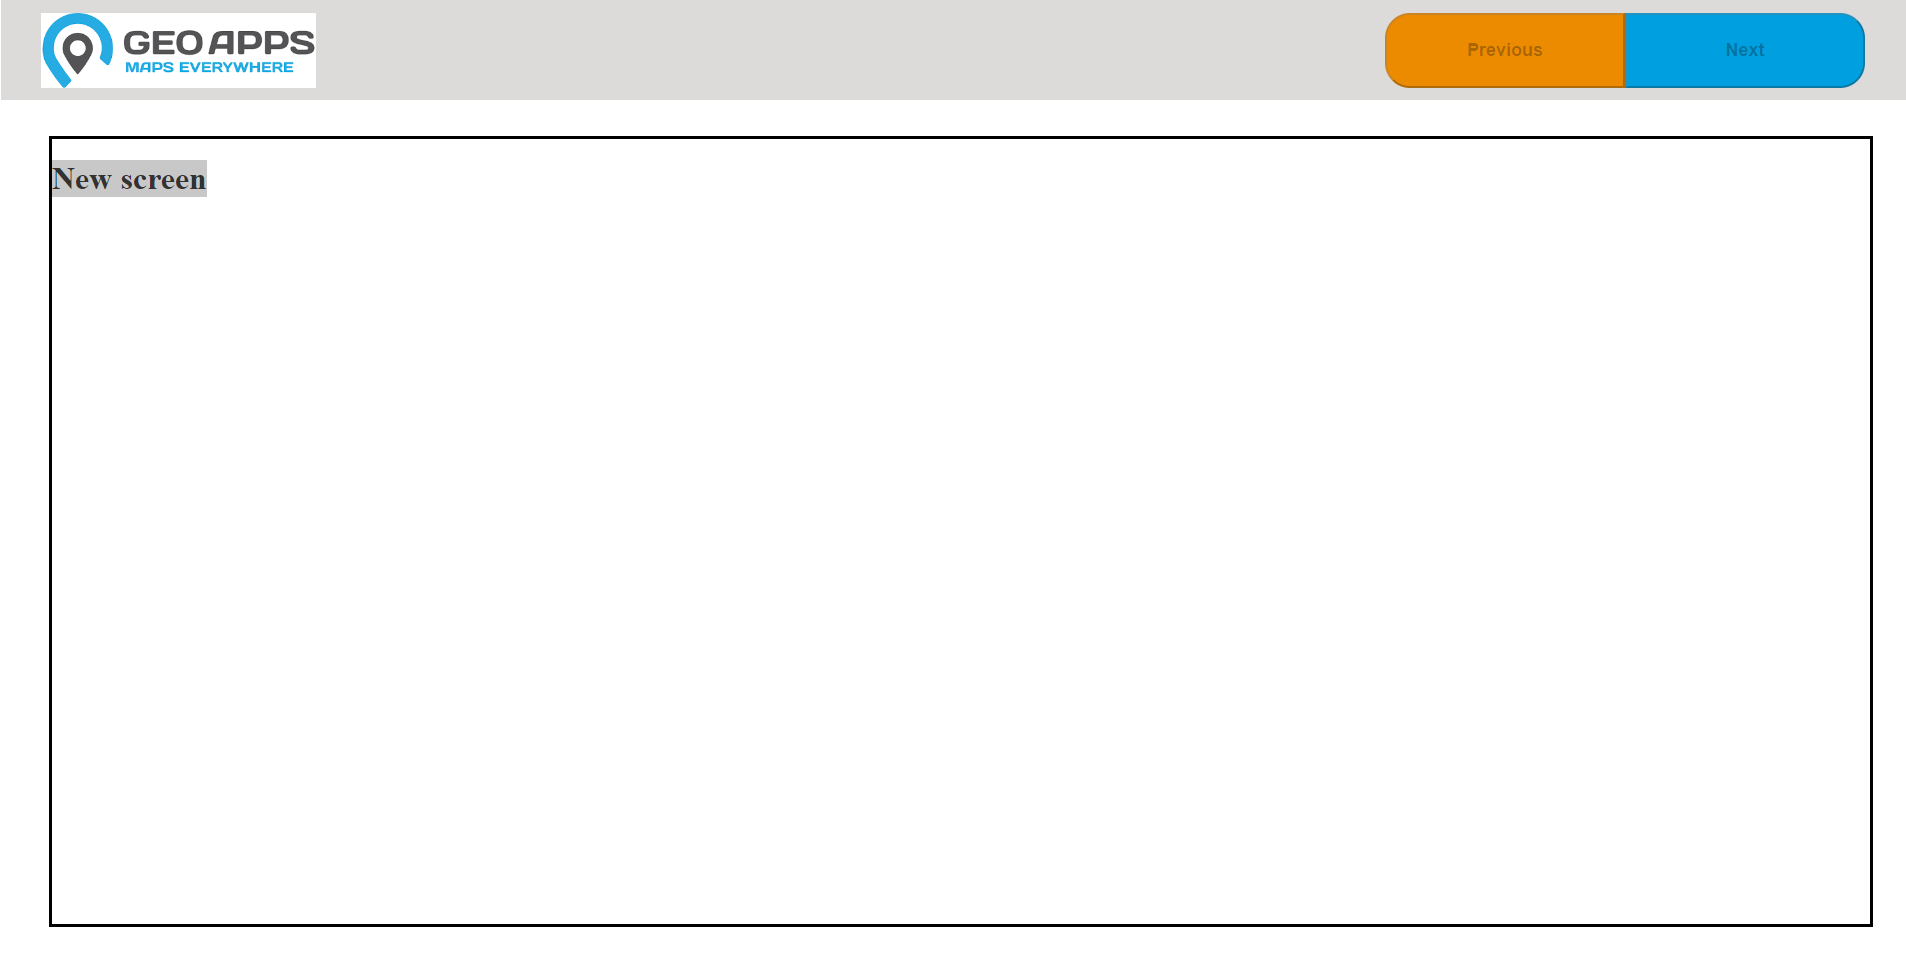
Navigate to our app and go to Settings:

At the Branding field you can choose your branding in the dropdown menu. After you have clicked Save, you can go back to the preview and view your app with the branding. Whenever you change the Accent Color of your branding, it wil change in the app itself.
You can create multiple intances of the branding we've uploaded by creating a new branding that references the default. Each branding can have its own configured styling. Using branding, you don't have to create different apps with different styling, but can publish one app and create multiple brandings to add to the app.
Adding an image via branding
Adding an image (for example, a logo) via branding goes a bit different.
The app layour has a div with the classname logo:
import React from "react"
import { ScreenSlot, Next, Previous } from "@mapgear/geoapps-ui-framework";

export const AppLayout = () => {
    return (
        <div>
            <div className="top">
                <div className="column-left">
                    <div className="logo"></div>
                </div>
                <div className="column-right">
                <Previous className="button prev">
                    Previous
                </Previous>
                <Next className="button next">
                    Next
                </Next>
                </div>
            </div>
            <div className="screenslot">
                <ScreenSlot animation="none"/>
            </div>
        </div>
    )
};
On this div, we want to add the logo of our app.
Look up .logo in the main.less and add the following code:
@logoUrl: url(@logo);
.logo {
    background-image: @logoUrl;
    height: 75px;
    width: 275px;
    left: 5%;
    top: 12.5px;
    position: absolute;
    background-size: 100%;
    display: flex;
}
@logo will become the key value in the manifest. Add the following code to the manifest:
- key: "@logo"
  title: Logo
  type: File
  value: "~/resources/images/logo-geoapps.svg"
Your manifest branding field will now look like this:
  branding:
    main: ./less/main.less
    themes:
      - themeId: 83ceff8a-98df-44ac-ac90-4df359a45bfe
        title: Default
        default: true
        variables:
          - key: "@accentColor"
            title: Accent Color
            type: Color
            value: "#00b0ff"
          - key: "@logo"
            title: Logo
            type: File
            value: "~/resources/images/logo-geoapps.svg"
Build and publish the app again.
Once you have published the app agian, the Logo key wil be added to your branding:

You now need to set an image in the Edit Value tab:
![]() Click Save.
Click Save.
When you reload your browser, the image will be visible in the app: