Part 1: Getting started with apps
Setting up a development environment
To start building an App, we first need to set up a development environment. As text editor we advise to use Visual Studio Code (VSCode): Visual Studio Code - Code Editing. Redefined. Next, we are going to install NodeJS and NPM package manager. Check Downloading and installing Node.js and npm | npm Docs (npmjs.com) and Download | Node.js (nodejs.org) on how to do this.
Create a new folder and open this folder in VSCode. This is where we are going to build our app.
Installing packages
We want to install multiple packages via NPM in order to create our app.
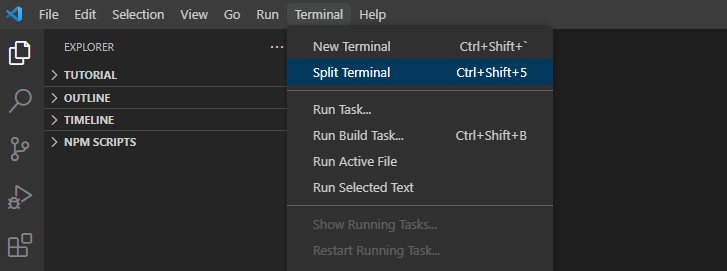
Open a new teminal (check image below) and run the following command:
npm init
npm init asks you to anwser a couple of questions in the terminal to set up a new npm package:
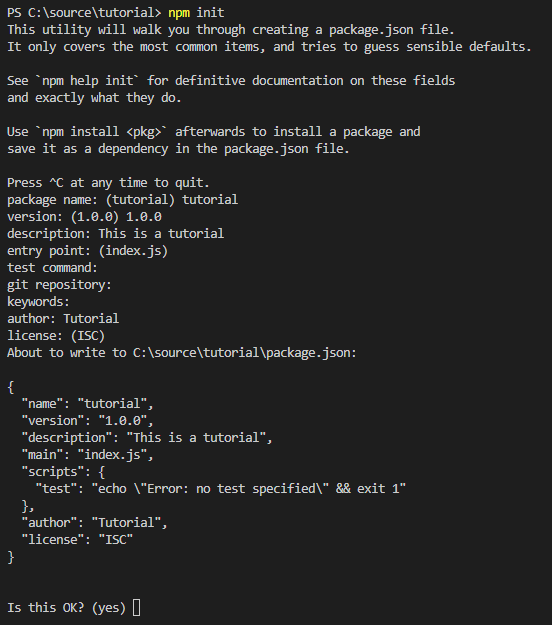
After answering these a package.json gets generated. This file manages all packages that we are going to install in this tutorial. Remove main from the package.json.
For this tutorial we are going to use React. In the terminal insert the following command and press enter:
npm install react react-dom
React and React-dom are now installed and are added to the package.json:
{
  "name": "tutorial",
  "version": "1.0.0",
  "description": "This is a tutorial",
  "scripts": {
    "test": "echo \"Error: no test specified\" && exit 1"
  },
  "author": "Tutorial",
  "license": "ISC",
  "dependencies": {
    "react": "^18.2.0",
    "react-dom": "^18.2.0"
  }
}
Next, we are going to install parcel: parcel - npm (npmjs.com). Insert the following command into the terminal:
npm i -D parcel@~2.6.2
Lastly, we are going to install the GeoApps CLI: @mapgear/geoapps-cli - npm (npmjs.com). Insert the following command into the terminal
npm install @mapgear/geoapps-cli
GeoApps cli
When you go to the page of the GeoApps CLI (click link in previous section), we see that we can run multiple commands with this CLI needed to develop our app.
In our packaga.json, we are going to add another script. Underneath script add the following:
"init": "geoapps init --only-config"
which results into:
{
  "name": "tutorial",
  "version": "1.0.0",
  "description": "This is a tutorial",
  "main": "index.js",
  "scripts": {
    "init": "geoapps init --only-config"
  },
  "author": "Tutorial",
  "license": "ISC",
  "dependencies": {
    "@mapgear/geoapps-cli": "^0.7.1",
    "react": "^18.2.0",
    "react-dom": "^18.2.0"
  },
  "devDependencies": {
    "parcel": "~2.6.2"
  }
}
We are going to run this script in our terminal with npm run init. This will also ask you a couple of questions. It will ask about to fill in an app id. Best is to generate a GUID on Free Online GUID Generator
Two files are now generated.
Geoapps.json
A couple of things need to be filled in the geoapps.json file. First of all remove $schema and fill in your personal token bound to your tenant. A tenant is an url that refers to your GeoApps environment. It will look something like: environment.geoapps.nl. Your can visit login.geoapps.nl/token/generatepat to generate a token.
Next, set autoOpen to false and lastly, add resources, less and dist to contendDirs. Your geoapps.json should look like this:
{
    "debug": {
        "tenant": "<your tenant>",
        "token": "<your token>",
        "appConfig": {
            "mode": "remote",
            "appId": "<your app id>"
        },
        "browser": {
            "autoOpen": false
        }
    },
    "package": {
        "contentDirs": ["dist", "resources", "less"]
    }
}
resources, less and dist are folders that we are going to add later on.
Manifest.yaml
The manifest.yaml file contains the definition of our app. In our main folder which we created earlier, we are going to add 3 new folders: src, resources and less. In the less folder we add a file called main.less. Lastly in our main folder we add the index.html. Your folder structure should now look like this:

Fill in both main`s in the manifest.yaml:
version: "1.0"
app:
  id: <your app id>
  title: Tutorial app
  description: This is a tutorial app
  author: Tutorial
  version: 1.0.0
  main: ./dist/index.html
  branding:
    main: ./less/main.less
    themes:
      - themeId: <your theme id>
        title: Default
        default: true
The first main should refer to the index.html in the dist-folder (the build-script copies the index.html to this folder) and the second main to the main.less file.
Adding extra scripts
Before we are going to start creating our app, we first need to add a couple more scripts in our package.json, which are the following:
"scripts": {
    "build": "parcel build --no-cache --public-url ~/dist/ index.html",
    "server": "geoapps serve",
    "publish": "geoapps publish --tenant <Tenant URL> --token <token>"
  }
Completely fill in the publish script with your tenant and token.
With the build-script we can compile our files and insert them into the dist folder, which get created when running this script. The server-script starts a local development server which you can access in your browser at https://localhost:8080. Everytime you change things in your app, you should rerun the build-script and reload the browser in order to make changes visible.
The publish-script publishes your app your environment (the given tenant-url in geoapps.json). It published the files given in the contentDirs in the package.json.
Showing a map in the app
Now we are going to start creating our first app. In this app we are first going to show a map.
You first need to create a map in your manage environment. Check Maak een nieuw project (geoapps.nl) and Inrichten van de kaart on how to do this. We need the id of this map. You can find this id on the manage page of this app. In your browsers url searchbox (in the manage page of the map) the id can be seen after the last /.
For a quick start, copy and paste the following code in your index.html:
<html>

<head>
    <link rel="stylesheet" href="https://<tenanturl>/scripts/geoapps/v1/geoapps.min.css" type="text/css" />
</head>

<body>
    <div id="map"></div>

    <script type="text/javascript" src="https://ajax.googleapis.com/ajax/libs/jquery/3.3.1/jquery.min.js"></script>
    <script type="text/javascript" src="https://<tenanturl>/scripts/geoapps/v1/geoapps.min.js"></script>
    <script type="text/javascript">
        $(function () {

            // Verify if geoapps is found in the window
            if (geoapps) {
                geoapps.Initialize("<your tenanturl>", {
                    authorize: "token",
                    token: "<your token>" // Replace this value with the token that is retrieved through GeoApps
                });

                var map = geoapps.AddMap("map", "<your map id>"); // id need to be replaced with the id of the map
                map.Controls.AddZoomControls(); // Add zoom buttons to the map
            }
        });
    </script>
</body>

</html>
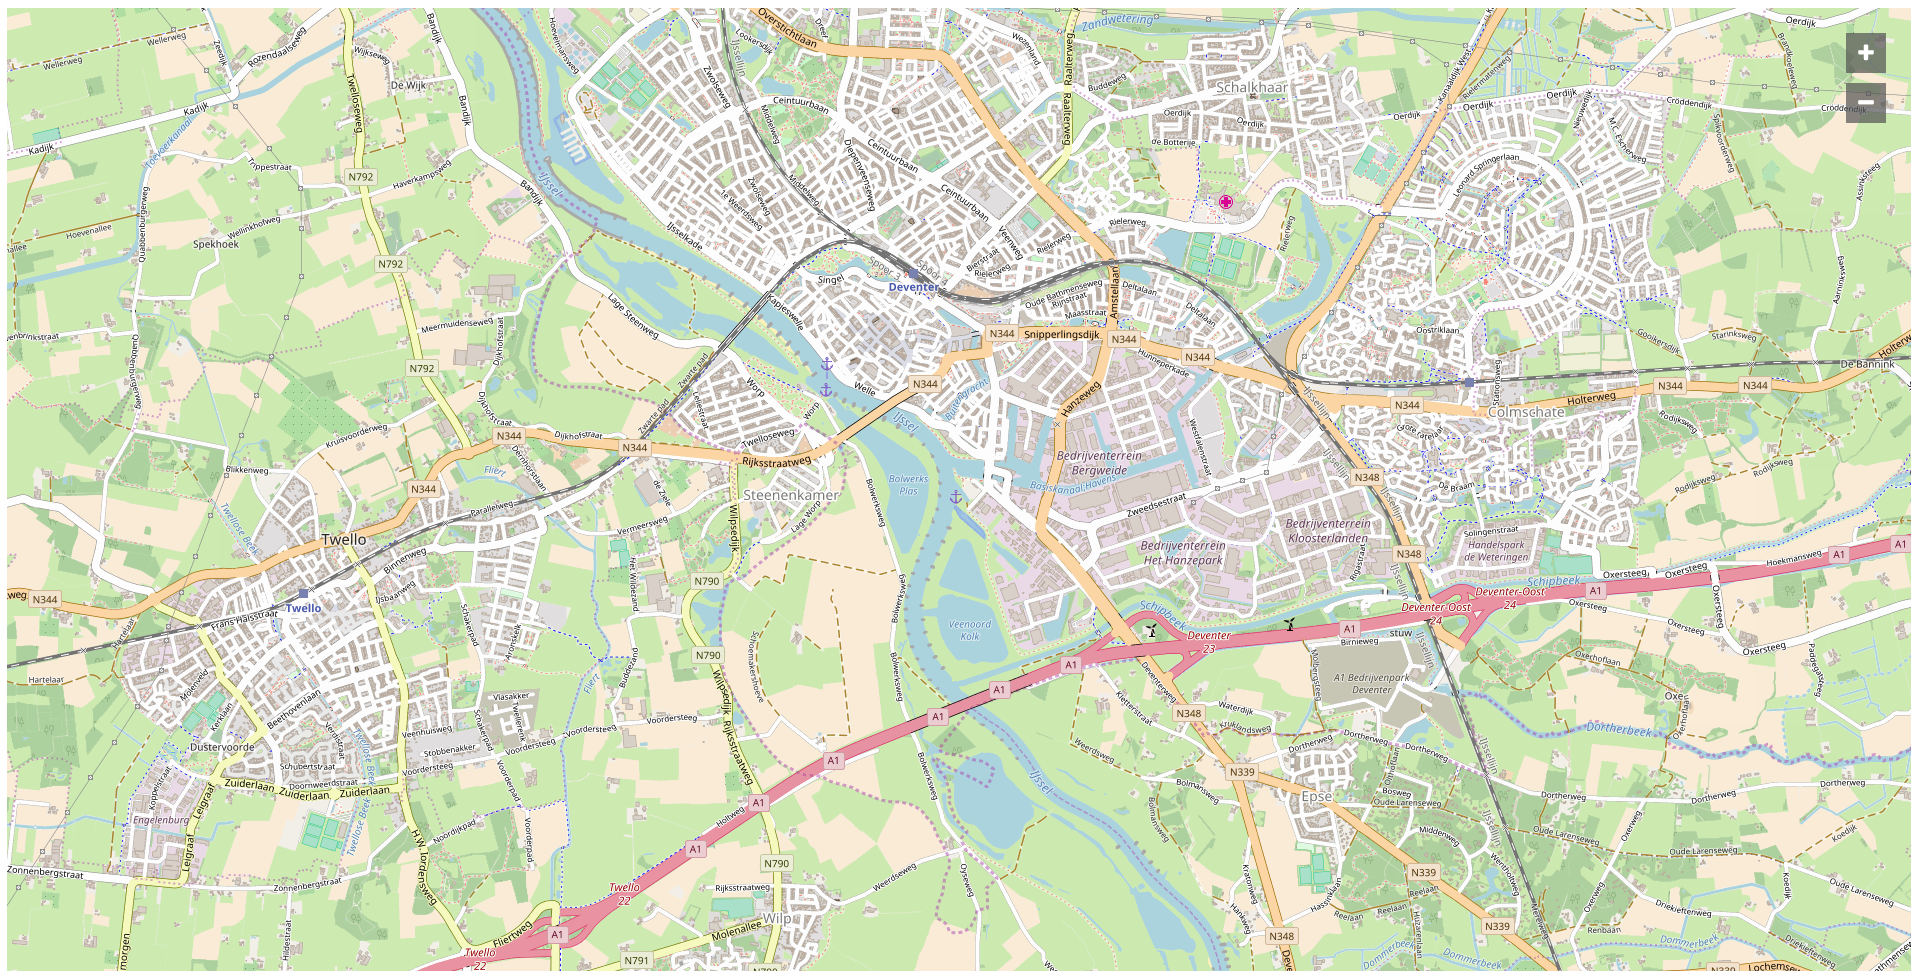
Dont forget to fill in the tenant, map id and token. After you have run the build-script and started the local server with the server-script (best is to run this script in a second terminal). You can open your app in the browser at https://localhost:8080. You should see the following:
Insert an image
When you build a custom app, you probably want to include external resources like images. To get these working in GeoApps, you need to provide the path to the resource from your html, css or any text file.The image we are going to use can be found here: GeoApps logo.
Add the following code somewhere in the body of your index.html:
<img src="~/resources/images/logo-geoapps.png">
To resolve the issue that the exact path is not known, we provide the possiblity to use a path which begins with ~/. When you reference for instance the path ~/images/sample.png, this indicates a relative path from the main-file as specified in the manifest.yaml.
Example: when your index.html is in the ./src folder, you define in the manifest-file the following: main: ./src/index.html. Using a path like ~/images/sample.png will search for the specified image in the folder ./src/images/.
After building your app, the image should show in your broswer:

Dont worry about styling yet. That will come in the next part.